Now complete. The overall goal will be to have all of your data on one partition. I am sorry you're having to go through all this. I should have recommended what a normal person would do. Hopefully I'll make this guide easy enough that it won't be too much of a hassle. I am going to assume that the partition you have Windows installed on is the C: drive. I am going to assume that the very large partition that you have for data is referred to as the D: drive. If not you'll have to take that in to account as you follow this guide. The overall strategy is to move any data you have put on the D: drive to the C: drive. Then you will delete the D: drive and then enlarge the C: drive to utilize the entire contents of the hard drive. 1. Go to Start (Windows Orb some call it) > Control Panel > System and Security. Under "Administrative Tools" you will see "Create and format hard disk partitions". Click that. You should see something like the image below: 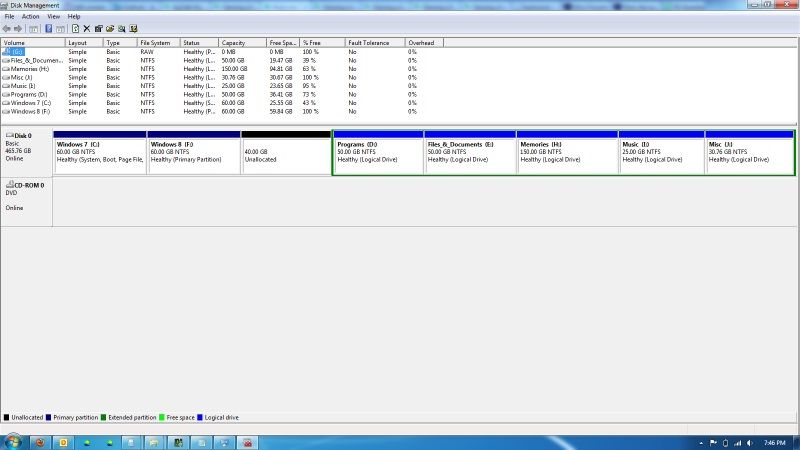
You can see there is a list of volumes. The first one that shows up on my list is my DVD drive and the rest of the ones in the list are partitions on my hard drive. Below that you can see a graphical representation of how each drive is divided. You can see that my hard drive has two partitions that are dark blue/purple, an unallocated black area, and then 5 blue partitions that are all grouped together by being outlined in green. The dark blue/purple partitions are primary partitions. You will have either two or three of these. I would imagine you'll have three, one of which will be the 100 MB partition that Windows created when you installed. My five partitions that are outlined in green are different than anything you will likely ever use so I'm going to ignore them. We will instead focus on my Windows 7 and Windows 8 partitions. I do not have Windows 8 yet so I am going to remove the Windows 8 partition, then I'm going to enlarge the Windows 7 partition so it fills in the space that was left by the Windows 8 partition. Since I have unallocated space behind the Windows 8 partition (that I reserved for my Linux installation at a later date) I will be able to expand my Windows 7 partition to be 160 GB (60 for the original partition, 60 for Windows 8 partition and 40 of unallocated will all be Windows 7). 2. Make sure that you have moved all the data off of your large D: partition and in to the smaller C: partition. 3. Delete the D: partition. The way I did this was by right clicking on the graphical representation of my Windows 8 partition. See the image below: 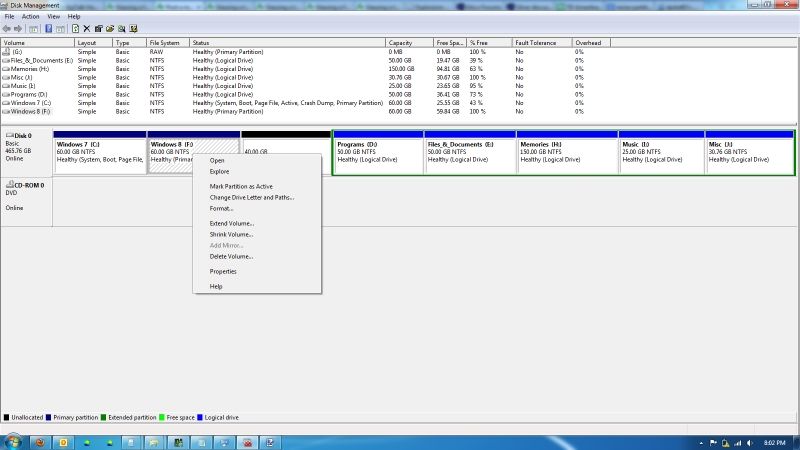
Then I clicked "Delete Volume". Absolutely do not do this until everything that's on the partition is backed up or transferred to the C partition or something. This is where I had problems. It said are you sure you want to delete and I said yes. Then it said the volume is in use and asked if I wanted to force it to delete. I don't like forcing anything on a computer so I said no. I restarted the computer and tried again. It still didn't work. So I restarted and booted in to safe mode. Don't boot in to safe mode unless you get the error that I got. I searched on the internet and it appears that a lot of the time one does not get that error. But if you do, go ahead and restart your computer and then start tapping the F8 key a little bit faster than 1 time per second until the computer gives you the option to boot in to safe mode. If you need to boot in to safe mode, keep reading. If you don't, skip down a ways. 4. So now you've booted in to safe mode. It looks old school right? Go to Start > Control Panel > Administrative Tools > Computer Management. Single click on "Disk Management" now. 5. Since you don't have video drivers loaded in safe mode, there isn't much screen real estate and Disk management looks different in safe mode. See below: 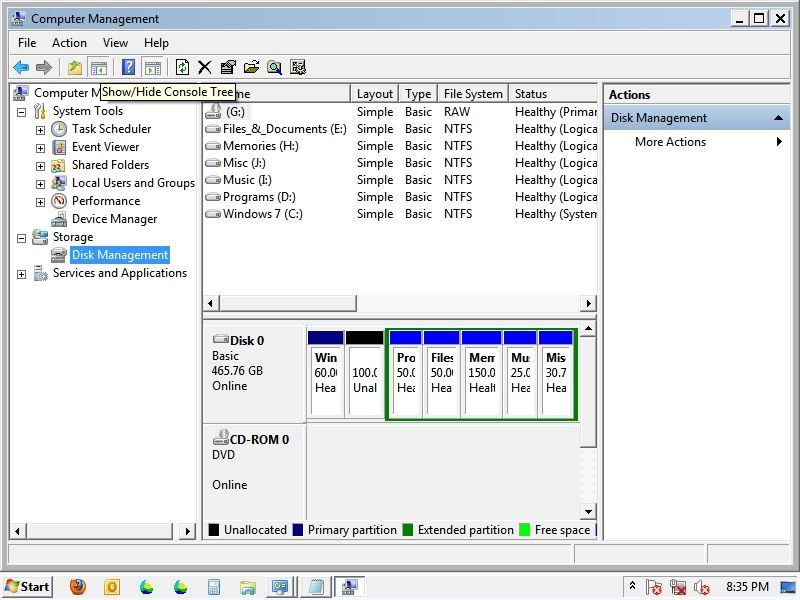
To make things easier to see I removed the sidebar on the left and the sidebar on the right. Notice the buttons below "File". One of the bottons looks like a question mark. The button to the left of that removes the left side bar and the button to the right of that removes the right side bar. You should see something like what I have below: 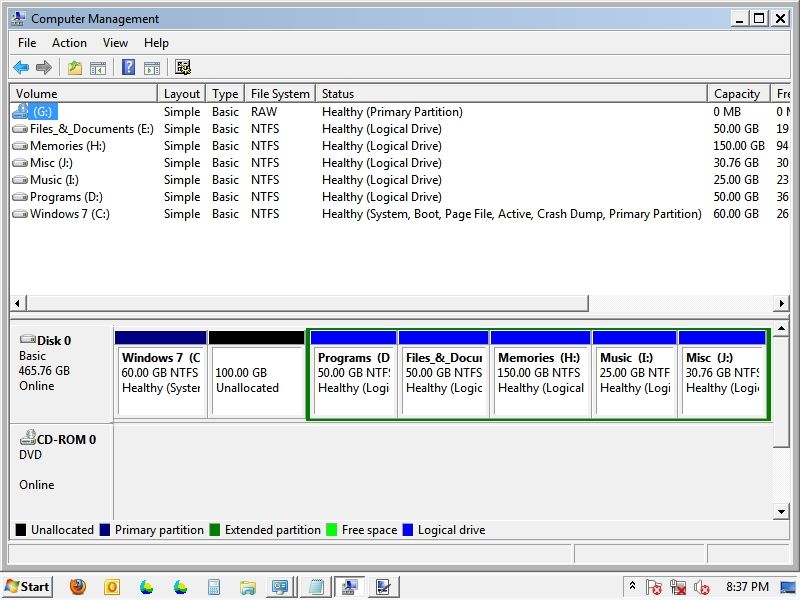
As you can see, I already deleted the Windows 8 partition as I described above. Now I have 100 GB of unallocated area rather than 40 GB. 6. Now it's time to extend the Windows 7 partition. Right click on the Windows 7 partition as shown below: 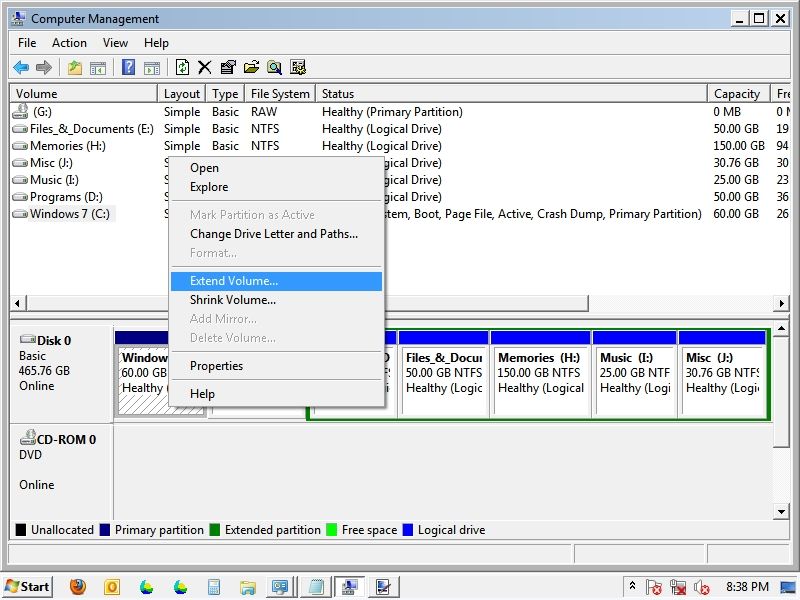
Note that the bottom left corner of the pop-up Window is where my mouse was. There was not enough room for the menu to populate down so it populated up. I don't know why the "Print Screen" button does not show where the mouse was. Anyway, click "Extend Volume". This should open the "Extend Volume Wizard". Click Next. You'll see the screen below or something similar: 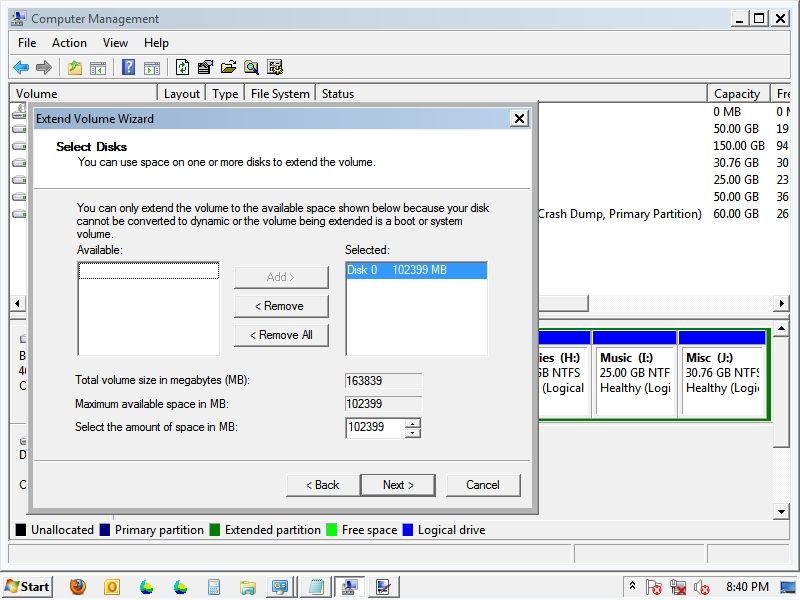
As you can see, for me the wizard defaulted to where it was going to extend my partition by 102,399 MB as shown in the "Selected" box. Hopefully yours will show way more than that and all you'll have to do is click next. That's what I did. When I clicked next I got what you see below: 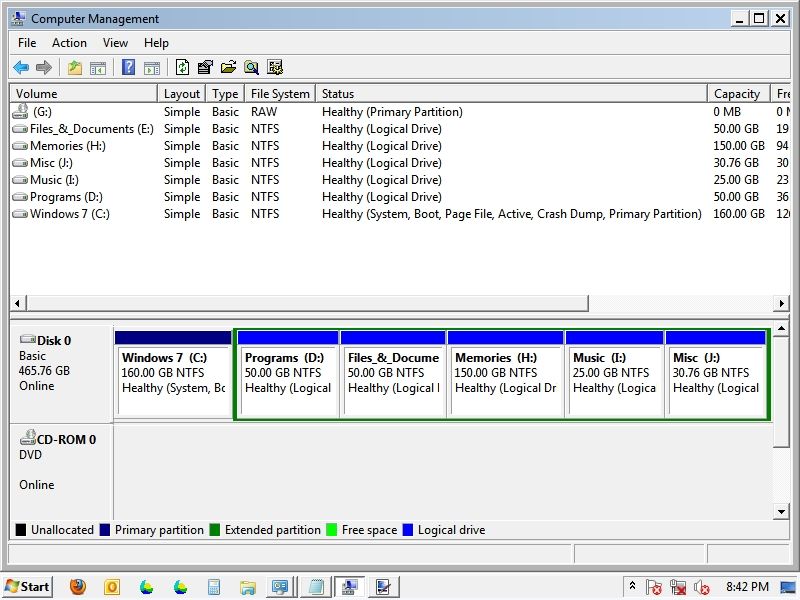
My Windows 7 partition has taken all the space that was unallocated. Make sure you restart your computer afterwards just to make sure that everything registers properly. I'm currently typing on Windows 7 so it did not mess up any of the data that I had on my Windows 7 partition. I'm slightly concerned about shrinking the partition back to the way it was, but I think I'll be alright. Good luck.
Edited by dpilot83 4/15/2013 21:08
|  Windows 7 install continued from below.

