Hi all. Please pardon the perhaps out of sequence wording of the title, but I wanted to get the keywords there for those that may use the search feature. I had some damage to the rotor some time back and was able to get by after adding over a pound of weight last year. This year it has to be dealt with. So,....removal. Please forgive the lack of picture volume as I have not been taking as many pics as I used to and forget to pick up the camera sometimes, especially when I am by myself. Here goes. I used the forklift to pull the feeder off it's mounts after removing the minimum of components. If you are on a concrete floor in a shop, you can use a cherry picker and chain up the feeder cross brace. I started the combine and pushed the header switch to "up" which pushed the forklift away from the combine until the feeder pivot tubes were clear of their mounts. Then lowered the feeder to below the mounts, and called someone over to hold the switch in the "down" position while I pushed with the forklift to get the feeder under the pivot mounts. Newer models may not need to do that, but my old machine has those hydraulic hoses hanging from under the cab that I did not want to unhook. I then supported the back of the feeder with a floor jack and stands.  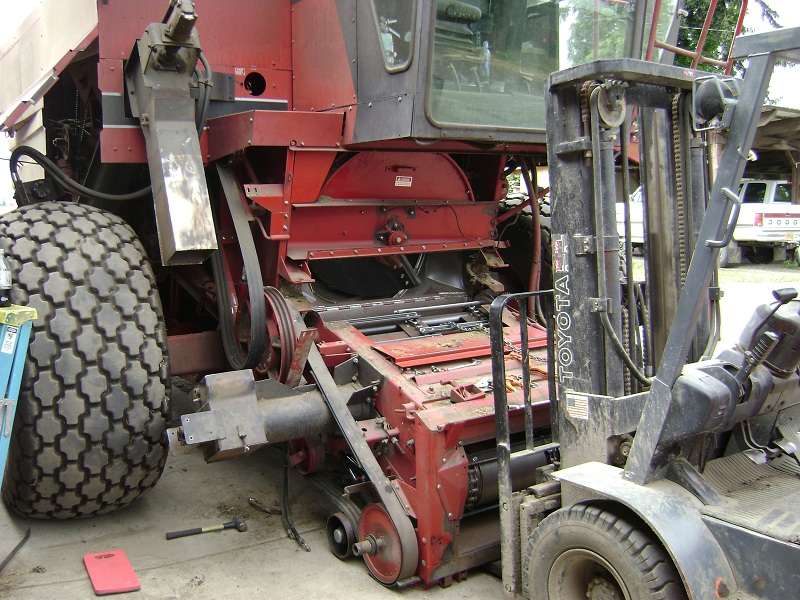
Supervisor on smoke break.  Hooking the forks under the bearing plate lip and chaining it so as I back up the forks cant slip out from under the lip. I had 2 pieces of 2x6 between the rotor and concaves at about the 4:00 and 8:00 positions after removing the center grate for access. Then start backing up carefully.  Once far enough out, I set the rotor on the feeder lip and unchained.  Then re-chained over the rotor like so and completely removed the rotor.  The 2x6s worked well until one slid down and acted as a jam lever. I had to push the rotor back in an inch and release the 2x6, then continue.  There it is. Rotor removal with minimum component removal and leaving the feeder cylinders attached. Yes, I do know the feeder is missing the flap across the top front, but I bought a brand new one when I rebuilt the feeder and it was instantly ripped off when combining corn with a grain platform and ran throught he machine. d:-(  Those hoses under the cab are not as tight as they look. Thanks for looking. I hope that may answer a few questions that some may have on rotor removal. Install of course will be different, but I hope to have pics of that in a week or so.
Edited by Old Pokey 6/20/2011 23:33
|  1680 Case IH combine rotor removal. (with pictures)

